Showing posts with label cake. Show all posts

12.23.2010

Baking a Bitter Cake

In the winter of 2008, I tore a recipe for a Whiskey-Soaked Dark Chocolate Bundt Cake out of the New York Times's dining section. I was so excited to make it. It contained quite literally all of the best things in the world: lots of butter, very dark chocolate, espresso, and whiskey--lots and lots of whiskey! It sounded delicious and exotic and very rich.

But I'd never made a liqueur-soaked cake before. I was a little afraid, so I tucked the scrap of newspaper away in my recipe box and forgot about it until a week ago when I was looking for something special to make for a family holiday party. I unfolded the crumpled newsprint and thought Aha! It fit the bill exactly: it would look beautiful, taste delicious, and feel distinctly holiday-ish--by which I mean sophisticated and special and a little expensive. Simply put, it would be perfect for a Sunday afternoon Christmas party with relatives.

So I set to work. At its core, it's a fairly straightforward butter cake recipe: it starts with creaming butter and sugar, then come the eggs and vanilla, and then you add the dry ingredients at the end. The only quirk is that the recipe ends similarly to Nigella Lawson's classic Dense Chocolate Loaf Cake recipe (which involves beating in alternating parts liquid and dry ingredients to the batter right before it goes in the oven).

The batter turned out beautifully: fluffy and rich and very, very alcoholic. I licked the spoon as I cleaned up and got a little bit tipsy. I mean, the cake itself has a whole cup of whiskey in it, even before it's baked and sprinkled with whiskey again!

Boozy, boozy batter.

The batter tasted a little, well, intense to me, but I figured that most of the whiskey flavor would bake out. So I went with it. I threw the batter in my Great Aunt Shirley's burnt orange bundt pan . . .


and baked it up. It came out perfect-looking, moist, and very very fragrant. My entire apartment smelled like rich chocolate with a touch of whiskey and espresso mixed in, as if Starbucks started serving cocktails alongside their mochas and lattes.


I plated it on my beautiful new milk glass cake platter (thanks, Mom!), splattered it with a few hearty tablespoons of whiskey, topped it with powdered sugar, and mourned the fact that I couldn't try it until the party. (Let's be honest: taste testing is the entire point of making cookies and cupcakes. Even if you make them to share, you get to try them right away--I need that instant gratification!)

The completed cake.

But I was terribly disappointed once dessert time arrived the next day. The cake was bitter, unbelievably so. The espresso powder, unsweetened chocolate, and whiskey all worked together to give it bite and nothing but. I couldn't taste the sugar or the butter or anything but char. The cake wasn't burnt at all, but it tasted like a chocolate-covered espresso bean that had spent some time in a fireplace!

I think that public opinion on the cake was split: half the party thought it was fantastic, and the other half smiled very politely and left a big chunk on their plates. As I watched my relatives nibbling away at the cake, I thought about how I'd do it better next time. Melissa Clark, the recipe author, had written that her grandmother had been the originator of the recipe. Clark had taken the recipe, drastically upped the alcohol content, and switched to unsweetened chocolate to add "sophistication" to the dessert while reducing its sweetness.

I decided right then and there that old fashioned was definitely the way to go with this one. Next time, I'm doing it Grandma Clark style: I'll be using semi-sweet chocolate, halving the espresso powder, and replacing half the whiskey with water. And, if it still turns out bitter, I think that a nice glaze (I'm thinking whiskey, cream, vanilla, and powdered sugar) will do a trick.

I may have been bitterly disappointed by this recipe, but I wasn't beaten. Hear this, Whiskey-Soaked Dark Chocolate Bundt Cake: we shall meet again!
The intrepid baker, ready for round two.

4.28.2010

Homemade Strawberry Cake

Ever since a recent lustful encounter with a boxed strawberry cake mix, I've been wanting to make a homemade strawberry cake. I wanted a recipe that incorporated fresh crushed strawberries and would pair well with fresh whipped cream frosting. Fortunately, this Fresh Strawberry Cake recipe from Recipezaar.com really fit the bill.
My strawberry cake!

The question is, is homemade strawberry cake really better than Duncan Hines's marvelous, monstrous, candy-flavored version? I mean, it's the tacky, bright-pink, sugary smoothness of it that's so appealing, right?
Mr. Hines's Strawberry Supreme.

The answer is yes and no. The box mix cake is extra moist and super fluffy and tastes just like a strawberry Skittle, so it's pretty much the best thing in the world. However, real strawberry cake is similarly moist, but it isn't so tender or so fluffy. With real fruit in the recipe, I don't think it's possible to obtain the same texture as a chiffon cake. And the homemade cake definitely isn't baby pink!
The naked strawberry cakes.

The cakes turned out to have a sugary, slightly dense texture, with an almost crispy crust; they were a little like a scone on the outside but were purely cake-like on the inside. They definitely tasted just like strawberries!

Crushed strawberries for the cake batter.

I had been wanting to make fresh whipped cream frosting for some time, and this seemed like the perfect opportunity to try it. I used strawberry puree (strawberries, a bit of sugar, and a dash of lemon juice) to take the frosting from plain to strawberry flavored.
The strawberry puree and fresh whipped cream frosting.

The pretty, petal-colored strawberry frosting.

The cut cake.

However, I ran out of frosting for my last cake round, so I used the strawberry glaze recipe that comes with the cake recipe. It was pretty tasty, too, though I didn't like it as well as the whipped cream frosting. The whipped cream was light and fresh and smooth and darn pretty. But the glaze looked chunky and *ahem* a little unappealing. Besides, even though it was delicious, it somehow made the cake taste more like a muffin than a proper cake.
The glazed cake.

But that just means I'm allowed to make this recipe in cupcake form and and eat it for breakfast, right?
A slice of the glazed cake.

I liked this recipe quite a bit, but I would like to find a chiffon version (if, indeed, that is possible with fresh fruit!). This cake was a touch heavy for me, even though it was wildly popular; pieces seemed to fly mysteriously from the platter every time I turned around! But it was a great way to deal with the vast amount of strawberries I usually buy each spring, futilely hoping that I can finish them before they start to go bad.
My favorite fruit.

Oh, and did I mention the best part of all? I suspect that all my frozen leftover strawberry puree will make some pretty fantastic margaritas come summer time! Hooray for buying in bulk!

3.30.2010

Experiments in Frosting

Velcome to my lab-OR-a-TOR-y!


If you read this blog regularly, you've probably noticed that I'm always fussing over frostings. Frostings are hard, unlike the cakes themselves, which almost always turn out. But matching the correct frosting with the right cake has always been much more difficult for me.

So what's a girl to do when she knows nothing about making a good frosting? She makes three in one night, of course, to teach herself how!

I decided to try my experimental frostings on Magnolia Bakery's Vanilla Cake, which is the cake I used for my last birthday cake. I knew that it would make a delicious base for my frostings without getting in their way.

I decided to make three kinds of frosting: royal icing, "Mom's Chocolate Frosting" from Ann Hodgman's Beat This!, and a chocolate ganache. Unfortunately, my royal icing refused to fluff with beating (pasteurized egg whites just don't work, unfortunately!), and I was left with some sugary glue instead of frosting.
Yummy! Royal glue destined for the garbage disposal.

Fortunately, I had enough butter in the house to make Gale Gand's Quick Vanilla Buttercream frosting instead. That turned out to be a fantastically good plan B.
The drool-inducing, spoon-licking buttercream goodness.

I mean, this stuff was good, way better than the buttercream frosting recipe that Magnolia Bakery uses on their vanilla cake; that frosting was heavy and cloying and crusty. But Gand's frosting, even though it's about 70% butter by volume, isn't overwhelmingly buttery or sugary. Instead, it tastes like fresh whipped cream, only sweeter and richer and, miraculously enough, whiter.

The trick to this amazing stuff is beating the butter and sugar together for three full minutes on medium power. This extra beating time transforms the butter from yellow and clumpy to pale and airy and delicate. And the dash of heavy cream beaten in right at the end makes the frosting taste unusually fresh and smooth. This was so good, that I literally had to stop myself from eating it by the spoonful! And I never do that with frosting (just cookie dough) (and cake batter) (but never frosting, I promise!).
The first nine-inch cake round frosted with buttercream.

The second recipe I tried was Mom's Chocolate Frosting. I had never made a chocolate frosting before, so I felt like I should try a recipe that was simple (Check!), required few ingredients (Check!), and called for a ridiculous amount of pure melted chocolate (Double check! This calls for twelve ounces of chocolate in a full recipe.).

However, besides the royal icing, this frosting was the most touchy one to make. Once the chocolate was melted, I added room-temperature vanilla and refrigerator-cold sour cream to mixture, which caused tiny bits of the chocolate to seize up and solidify--ack! But I whipped the mixture furiously and the ugly little chocolate crumbs melted away to reveal a beautiful, smooth, light brown frosting.
The sweet rewards of my furious beating.

To be honest, I didn't like tasting this frosting without a cake beneath it. It was just too sour for me, due partly to the sour cream base and partly to the Ghirardelli chocolate I used (which, to me, always tastes a little sour).

But once it was on the cake, this frosting was scrumptious and accessible. It's the kind of friendly, palate-pleasing frosting that a batch of ravenous six-year-old birthday party attendees would enjoy smearing all over their faces. (Hence the "Mom's" title, I suppose!) And it would be exceptional on a yellow butter cake.
Mom's Chocolate frosting on its cake round.

The final frosting, the ganache, turned out to be my runaway favorite. It's unbelievably simple to make: just heat heavy whipping cream to a simmer, pour it over finely chopped semisweet chocolate, and stir them together until . . .
 A smooth goop of mind-bending goodness.

 . . . it becomes a smooth goop of mind-bending goodness.

After the ganache cools for a few minutes, you pour it over the cake and smooth it out with a spatula. If you're more patient and less greedy than I am (and if you have a cooling rack to frost on), a ganache can actually turn out beautifully. Done my way, it turns out . . . well, you know:
"I'm pretty on the inside, darnit!"

As I wrote in my tasting notes, this frosting is "the most amazing thing that ever happened to anyone ever." And I made this recipe with cheap old Baker's chocolate--with really high quality chocolate, this would probably make a piece of soggy cardboard taste delicious.

At the end of the night, I ended up loving all of these recipes in different ways. I can't wait to try Mom's Chocolate Frosting on a yellow layer cake, I know that I'll make the vanilla buttercream at every chance I get, and the ganache--oy, the ganache!--will soon find itself smeared on strawberries and spritz cookies and chocolate crisp cookies and very moist and dense chocolate cakes.
The triumverate.

I'll leave you here with one last tasty idea for trying these frostings: cut out the crumby middleman and go straight to the good stuff with the frosting shot.

3.14.2010

Green Velvet Cake

Red velvet cake is rich, chocolaty, decadent, and ever-so-slightly tacky:
Just look at all that tasty red food coloring!

Green velvet cake is much the same, only way, way tackier:
Now that's class!

The only difference between red velvet cake and green velvet cake is the food coloring. I decided to "go green" with these cupcakes to celebrate St. Patrick's day. Also, I was almost out of red food coloring. (Trust me: there's nothing worse than pinkish-brown "red" velvet cupcakes. I know this from experience.)

I've been looking for a good red velvet recipe for awhile now. I tried one last summer that turned out dry and dull and underwhelming, just like any old box mix red velvet cake. *shudder*
 Trust me: it looks much, much better than it tastes.

Fortunately, I saw the Throwdown with Bobby Flay episode where Bobby takes on Cake Man Raven in a red velvet cake battle. Cake Man Raven is one of the most famous bakers in New York, and, of course, he trounces Bobby soundly in the episode. Since then, Cake Man has very kindly posted his secret recipe on FoodNetwork.com for my pilfering, and I'm gloriously happy about it.


In case you're (pitiably) unfamiliar with red velvet cake, it's basically a very soft, moist chocolate cake that includes vinegar and buttermilk. Apparently, old-fashioned cocoa powder would turn red when it came in contact with acids like vinegar and buttermilk, which is what originally gave the cake its red color. The vinegar and buttermilk also work with the baking soda to give the cake a light, fluffy texture.

Cake Man's recipe is a little unusual in that it calls for very little cocoa powder (only one teaspoon!) and a ridiculous amount of vegetable oil. CAUTION: Scroll down very quickly if you would like to actually enjoy eating these cupcakes.


The recipe calls for 1 1/2 cups of vegetable oil, which is a lot for any recipe. But because this recipe only makes about 30 cupcakes, each cupcake has about 3/4 tablespoons of oil it. Which is why they're so damn delicious.


Aaaaaaanyway. I tweaked Cake Man's recipe a bit. I wanted my cake to have a very fine crumb, so I substituted 1 1/2 cups of cake flour for some of the all-purpose flour. I also wanted a stronger chocolate flavor, so I replaced 2 teaspoons of flour with 2 teaspoons of cocoa powder for a total of 3 teaspoons of cocoa powder. And, of course, I substituted green, blue, and yellow food coloring for the suggested red.

But despite my modifications, the batter turned out beautifully smooth, sweet, and tangy.
"Double, double toil and trouble; / Fire burn, and cauldron bubble!"

The cupcakes took about fifteen minutes to bake. They came out of the oven so deliciously soft and damp that I was glad I had made cupcakes; I don't know how anyone could tort such a cake--I imagine it would just fall apart with the effort!
Tender little green cakes, hot from the oven.

Unlike other red velvet cake recipes I've tried, this one had a very distinct flavor. The cupcakes didn't taste like chocolate, necessarily. Instead, they tasted like vanilla with a touch of fresh cream. But to say that these taste "like vanilla" is like saying that Michelangelo's David is a marble statue or that Sherron Collins is a basketball player: the content is correct, but the scope is utterly lacking. The flavor of these cupcakes is astonishingly complex, despite its prosaic components; the vanilla, chocolate, and buttermilk all play off each other to create a new flavor altogether. And trust me, it's a very good flavor.

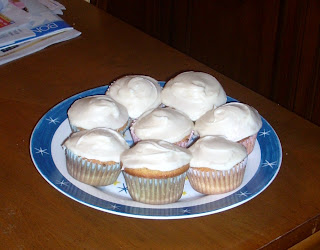
I made a cream cheese frosting for these using Nigella Lawson's cream cheese frosting recipe, which is nothing but cream cheese, powdered sugar, and a squirt of lime juice for added tartness. The frosting was delicious as always, but not quite right for this cake.

A cupcake topped with gooey cream cheese frosting.

Next time I make these, I'll pair them with a light, puffy, tooth-achingly sweet buttercream to contrast with the rich pungency of the cake. And I'll make a double batch of both recipes to spread the cake joy farther and longer. I have a feeling that I could eat these cupcakes for weeks, if given the opportunity.

From now on, this will definitely be my go-to red velvet cake recipe, and it's good enough that I would love to make it for birthdays and celebrations, too. So be very, very nice to me, and you might just get a velvet cake in your favorite color on your birthday!

3.09.2010

The Lazy Delight of Burnt Butter Cupcakes

Usually, when I feel like baking, I don't have the slightest problem hopping in my car and buzzing off to the nearest grocery store. But last week, I was tired and it was cold outside and I didn't want to spend any money and, gosh darnit, I was feeling whiny and there was nothing in the world that would set me right but an easy, no-hassle, delicious cupcake.

Luckily, Nigella Lawson came to my rescue with her Burnt Butter Cupcakes from How to Be a Domestic Goddess. Every ingredient in the recipe was already lurking somewhere in my fridge or pantry, so I didn't have to do anything but hike up my sweatpants and bake. I call that a pajama WIN!

The completed Burnt Butter Cupcakes

These sound pretty strange--how often, really, do recipes call for purposefully burning something? But I was intrigued because of an article I read in Vogue last summer. Jeffrey Steingarten, Vogue's regular food critic, wrote an article about the wonders of brown butter and how, if done properly, it can add a rich, nutty, smokey flavor to almost any savory or sweet dish. 

So what does burnt butter taste like, exactly?

Toffee. That's it. I'll admit that I was surprised by this when I first sampled the batter, but then I had a total *duh* moment: what else is toffee but burnt butter and sugar? Of course these would taste like vanilla toffee!

The very first step of the recipe, burning the butter, was its most nerve-wracking part. Burning butter just doesn't seem like a wise thing to do. What if I burn my butter beyond repair?, I worried. What if my burnt butter tastes terrible because, well, it's burnt, even if Nigella's tastes mind-bendingly good?

But the process was actually quite simple, and it was easy to tell when the butter was properly burnt. (I couldn't take a picture of this, however, since the butter was too foamy to tell that its oil was turning brown!)
The unsalted butter melting over medium heat.

The butter bubbling and foaming mid-way through its burning.

The finished burnt butter, with the sediment strained out on a piece of cheesecloth.

As always, Lawson's recipe was very easy to follow. My only hiccup was that, even after thirty minutes of sitting out/in the fridge, my burnt butter would not solidify like it was supposed to. So I just threw it in my batter as a liquid, and it didn't seem to do any harm. In fact, it possibly improved the airiness of the cupcakes' texture!
The mixed batter.

The recipe produced very few cakes (only eleven very tall cups), and they baked very quickly, so the most time-consuming part of this recipe was prepping the butter. The cakes turned out to have a fine, tender crumb and to be light golden in color. They reminded me of cornbread, only sweeter and without that unpleasant density and dryness common to most cornbreads.

The high domes on the baked cakes.
 
If you look closely, you can see the fine crumb.

The frosting was the only thing I didn't like about this recipe. It was far too sweet for me, and a little heavy, to boot. After the light, sweet, mellow burnt buttery-ness of the cupcakes, I didn't enjoy how sweet the frosting was or how strongly it tasted of burnt butter (you burn even more butter for the frosting recipe!). It was kind of like eating caramel frosting --ack!!! *cough, hack, pitooey*--only grainier. I would have much rather topped these with a puffy whipped cream frosting or some mild cream cheese frosting.
The super-sweet, super-smoky frosting.

However, others disagreed with me. My mom liked the frosting as-is, but thought it was very rich, and Charlie downright loved the frosting. I think my dad was fond of it, too.
Aren't these purdy?

At the end of the night, happily stuffed with buttery, toffee-flavored, crumbly-rich goodness, I would definitely recommend these burnt butter treats to anyone. These were easy-to-make, but they possessed a certain sophisticated je ne sais quoi after a lifetime of boring old white cake recipes. So go ahead: burn it, baby!

2.21.2010

When Laziness Pays Off: Store-Bought Baking Mixes

On hectic, frigidly cold weekends like these, there's nothing better than "baking," by which I mean the kind of baking that involves sitting on my duff with my feet up in the air, smelling the aroma of baked goods wafting through the house and waiting for the timer to ding.

I admit it: sometimes, I love store-bought, easy-to-make baking mixes. I've turned to the ease and comfort of Pillsbury and Betty Crocker more than once, and I'm sure I will do it again.

Of course, there are plenty of sweets that should never be baked via mixes. I've learned from hard, hard experience that spice cake, carrot cake, and red velvet cake mixes are always horrible disappointments, not to mention instant "cheesecakes" of all brands and varieties.

But some things do work, and they work extraordinarily well! Here are three of my favorite lazy-woman's baking mixes:

1) Krusteaz Cinnamon Crumb Cake: Krusteaz's crumb cake is so damn good that it's been mistaken for my grandmother's coffee cake, and that's saying something! The cake is sweet and dense and vanilla-y, and the crumb is, like all coffee cake crumbs, a fantastically bad-for-you-but-so-delicious-you-don't-care mixture of cinnamon and brown sugar. I made this last week when I was dead on my feet but set on something sweet for breakfast the next morning.

2) Simply . . . Chocolate Chip Cookies: Normally, I would never have bought these, but I had a coupon and a hankering for a lazy cookie. Simply . . . cookies are Pillsbury's attempt at making a refrigerated dough that isn't completely stuffed with preservatives. My thinking is that if you're interested in a "healthier," less chemical-ridden cookie dough, you should just mix it up yourself!

But after trying these, I would recommend them to anyone. They turned out perfectly round and neat-looking, and they tasted way better than regular refrigerated cookie dough. I think that they even tasted better than my chocolate chip cookie recipe! I was flabbergasted but very, very pleased.

3) Duncan Hines Milk Chocolate Brownies: Yes, yes, I know, it's so easy to make brownies, but sometimes I don't want to do anything more to a batter than mix, pour, and walk away! More importantly, sometimes I'm at Charlie's house and he has nothing to work with but a half-empty bottle of vegetable oil, four eggs, a non-stick cake pan, and a single mixing bowl. And so the brownie mix comes out!

Besides, let's be honest: as easy and as flexible as homemade brownies are, sometimes I just want that rich, dark, soft, tender, wonderfully homogeneous brownie mix sort of taste. Charlie loves them "cake style," with an extra egg in the mix, and I have a particular passion for that papery little crust that forms on the top of a well-made mix brownie! Mmmmm, you can see it in the picture . . .

Reader, do you have any baking mixes you would recommend? C'mon, spill your secrets! I promise not to tell at the next potluck or family reunion . . .   ;)

Also, didn't this guy at the Heat Eat Review have a fantastic idea for a blog? Why didn't I think of that!

2.08.2010

Whoop(s)ie Pies: Tangling with a Pennsylvania Dutch Classic

After spending eight hours on my feet making sandwiches, salads, croutons, and hot cafe beverages for hundreds of bakery patrons, is it really a good idea to go home and attempt a monster batch of Whoopie Pies?
 
A miraculously successful whoopie pie.


No, it isn't, but that's what I decided to do last Friday night.

I should have known that I was too tired for baking. I couldn't measure the ingredients for the life of me, and the mixing process was downright harrowing: I forgot how many scoops of flour I had put in at one point ("Was that scoop four or five? Do I risk two more? Four or five?! Gaaahhh!"), then I confused the baking soda with the baking powder and had to estimate the difference between one teaspoon and one-and-a-half tablespoons, and then I almost added an extra half cup of milk to the batter (the measuring cup was poised above the bowl when I said to myself, "Wait a second . . . wait a second . . . No! Stop it, hand! Stop!").

But I just had to have a whoopie pie. I hadn't had one in at least a year, and my whoopie pie biological clock was apparently ticking. I used to occasionally buy them from an Amish farmer's market near my house in State College, PA. According to Wikipedia and WhatsCookingAmerica.net, whoopie pies are a Pennsylvania Amish tradition. They used to be made from leftover cake batter. Amish wives would take the extra cakes, fill them with creamy frosting, and hide them in their husbands' lunch pails. When the men would open up the boxes and discover the pies, they'd shout "Whoopie!" Though the cakes originated in Pennsylvania Dutch country, they've spread throughout New England and are becoming popular all over the U.S.

Despite my struggles, my instinctive pie lust won out and the whoopie pies survived. In fact, nearly a hundred individual whoopie cakes survived, and I was baking the darn things until 12:30 in the morning! The recipe is huge: it calls for six cups of flour, two cups of cocoa powder, three cups of sugar, and three cups of milk.

 
The mixed batter.

The resulting batter is smooth, fluffy, and very, very abundant: using my large cookie scoop, the recipe made 98 individual cakes, which made 49 whoopie pies!
 
Scoops of batter.
 
The cakes on their own were dark, delicious, and rich due to the high ratio of cocoa powder to flour, not to mention the fact that there's both butter and oil in the batter recipe*. The bottoms were damp enough to cling to the parchment paper, and the tops were sticky enough so that the cakes glommed onto each other when stacked.
 
The baked whoopie cakes, plus the crumby remnants of the first sampler cake.

The frosting was no less rich. In fact, it's better not to think about the frosting at all. In fact, it's better not to read the next two sentences if you're weak of heart or stomach. So just repress this, will you? The frosting is traditionally made with Fluff, whole milk, and shortening. That's right, pure butter Crisco, straight from the tub.
 
Sweet, fluffy death.

But enough about nutritional values: the frosting is okay when sampled with a fingertip--it's fluffy and creamy and mildly sweet. But it's fantastic when sandwiched between two moist, dense, dark-chocolatey cakes. 

These tasted exactly like the whoopie pies I bought at my farmer's market in Pennsylvania. When I ate my first one, I could almost see the mounds of fresh corn and squash and shoofly pies, and hear the Dutch accents on the air!

When you have your head about you, this recipe is actually very simple and very rewarding. Whoopie pies make for great bake sale or birthday party fare, if you're not in the mood for decorating a big honkin' cake. They're easy to make assembly line-style: just mix, bake, cool, slap on a coat of frosting, sandwich, and stack! And, of course, you get a lot of product while dirtying only a few mixing bowls. 

 
About one-fourth of the total recipe output.
This recipe comes from Moody's Diner through FoodNetwork.com. The recipe for the cakes is nearly perfect, but I agree with the Food Network commenters who thought that the frosting was very authentic but a little too synthetic/nauseatingly rich. Some of the comments suggested Martha Stewart's whoopie pie filling recipe, which I'll probably try myself next time.

Whether you fiddle with perfection or not, I strongly recommend giving whoopie pies a try: you'll never eat another mass produced Moon Pie, Swiss Roll, or Oreo again!

---------------
Whoopie Pie

Cakes:

  • 3 cups sugar
  • 1 cup butter
  • 4 eggs
  • 1/2 cup vegetable oil
  • 1 tablespoon vanilla extract
  • 6 cups all-purpose flour
  • 2 cups unsweetened cocoa powder
  • 1 teaspoon baking powder
  • 1 1/2 tablespoons baking soda
  • 1 teaspoon salt
  • 3 cups milk
  • Filling, recipe follows

Preheat oven to 350 degrees F, or preheat a convection oven to 315 degrees F.

In a large bowl of an electric mixer, beat the sugar, butter, and eggs together until well combined. Add the oil and vanilla and beat again.

In a separate bowl, combine all of the dry ingredients. Add half of the dry mixture to the egg mixture and beat or stir to blend. Add 1 1/2 cups milk and beat again. Add the remaining dry mixture and beat until incorporated. Add the remaining 1 1/2 cups milk and beat until blended.

With a large spoon, scoop out 32 circles of batter onto a baking sheet. Bake for 10 to 12 minutes. Let cool.
Spread filling onto 16 circles and place remaining circles on top, to make 16 Whoopie Pies.

Filling:

1 1/2 cups shortening
3 cups confectioners' sugar
1 1/3 cups marshmallow topping
Dash salt
1 teaspoon vanilla extract
1/3 to 1/2 cup milk

In the bowl of an electric mixer, combine all ingredients except the milk and beat well. Add just enough milk to achieve a creamy consistency. Spread filling across cooled cookie circles.
 
The finished whoopies.
 
*Please note that whoopie pies are a leading cause of heart disease, stroke, diabetes, and Weight Watchers memberships. Please consume with discretion. And a napkin.