Showing posts with label cookies. Show all posts

2.28.2010

Don't Try This At Home: Key Lime Sugar Cookies

No, really, don't try these at home. They aren't good.

 
Baked and frosted Key Lime Sugar Cookies

I know! They totally look like they should taste good, right? But they just don't. 

The recipe comes from Nancy Baggett's The All-American Dessert Book. It's only the second recipe I've made from the book--the first produced some decent-but-nothing-special fudgy brownies--but these were downright disappointing. 
  
Baggett's The All-American Dessert Book

The Key Lime Sugar Cookies had two flaws: 1) bitterness, and 2) bad texture. The bitterness could have come from several sources. The recipe calls for lemon extract (which smelled foul to me), lime zest steeped in vegetable oil, and reduced lime juice (which also smelled repugnant as I heated it on the stove). One (or perhaps all) of these ingredients made my cookies taste bitter instead of sweet or fragrant like I had expected. It's possible that I bought a bad lime or that reducing the lime juice burned it somehow (though the recipe implied that this was not possible).
Lime zest in oil and reduced lime juice.

The texture of the baked cookies was strange and unappealing. They were hard and sort of gummy, not crispy or soft and powdery (which is what their appearance led me to expect). Which isn't to say they were inedible: the texture seemed correct (neither over- nor undercooked), but just unappealingly dense.

The recipe also made very little dough and surprisingly few cookies.
 
Two little fist-shaped dough balls.

 However, rolling out and chilling the dough in sheets was a fun departure from my usual cookie baking process.
Rolled out dough, ready for the fridge.

 
The little "pills" that soon became lime wedges.

 Lime wedges ready for the oven.

I wasn't even in love with the frosting. With nothing but powdered sugar and lime juice in the mix, it was one-note and sweet without having any depth. And I wasn't very good at frosting my cookies all pretty-like. So they just got wiggles. So there!
 
Wiggly little wedges.
  
Anyway, despite their slightly wonky appearance, I deny any wrongdoing in the botching of this recipe! Why? Well, if only the texture or only the flavor was bad, I could blame it on incompetence. It's possible that I got some proportions wrong, or I burnt the lime juice or bought a bad lime, but I'm a good enough baker that I don't think I would make two major mistakes big enough to ruin a whole recipe!

So now what do I do with The All-American Dessert Book? Will I let two recipes ruin it for me, or will I give it another chance? Only time--and probably this blog!--will tell!

2.21.2010

When Laziness Pays Off: Store-Bought Baking Mixes

On hectic, frigidly cold weekends like these, there's nothing better than "baking," by which I mean the kind of baking that involves sitting on my duff with my feet up in the air, smelling the aroma of baked goods wafting through the house and waiting for the timer to ding.

I admit it: sometimes, I love store-bought, easy-to-make baking mixes. I've turned to the ease and comfort of Pillsbury and Betty Crocker more than once, and I'm sure I will do it again.

Of course, there are plenty of sweets that should never be baked via mixes. I've learned from hard, hard experience that spice cake, carrot cake, and red velvet cake mixes are always horrible disappointments, not to mention instant "cheesecakes" of all brands and varieties.

But some things do work, and they work extraordinarily well! Here are three of my favorite lazy-woman's baking mixes:

1) Krusteaz Cinnamon Crumb Cake: Krusteaz's crumb cake is so damn good that it's been mistaken for my grandmother's coffee cake, and that's saying something! The cake is sweet and dense and vanilla-y, and the crumb is, like all coffee cake crumbs, a fantastically bad-for-you-but-so-delicious-you-don't-care mixture of cinnamon and brown sugar. I made this last week when I was dead on my feet but set on something sweet for breakfast the next morning.

2) Simply . . . Chocolate Chip Cookies: Normally, I would never have bought these, but I had a coupon and a hankering for a lazy cookie. Simply . . . cookies are Pillsbury's attempt at making a refrigerated dough that isn't completely stuffed with preservatives. My thinking is that if you're interested in a "healthier," less chemical-ridden cookie dough, you should just mix it up yourself!

But after trying these, I would recommend them to anyone. They turned out perfectly round and neat-looking, and they tasted way better than regular refrigerated cookie dough. I think that they even tasted better than my chocolate chip cookie recipe! I was flabbergasted but very, very pleased.

3) Duncan Hines Milk Chocolate Brownies: Yes, yes, I know, it's so easy to make brownies, but sometimes I don't want to do anything more to a batter than mix, pour, and walk away! More importantly, sometimes I'm at Charlie's house and he has nothing to work with but a half-empty bottle of vegetable oil, four eggs, a non-stick cake pan, and a single mixing bowl. And so the brownie mix comes out!

Besides, let's be honest: as easy and as flexible as homemade brownies are, sometimes I just want that rich, dark, soft, tender, wonderfully homogeneous brownie mix sort of taste. Charlie loves them "cake style," with an extra egg in the mix, and I have a particular passion for that papery little crust that forms on the top of a well-made mix brownie! Mmmmm, you can see it in the picture . . .

Reader, do you have any baking mixes you would recommend? C'mon, spill your secrets! I promise not to tell at the next potluck or family reunion . . .   ;)

Also, didn't this guy at the Heat Eat Review have a fantastic idea for a blog? Why didn't I think of that!

2.08.2010

Whoop(s)ie Pies: Tangling with a Pennsylvania Dutch Classic

After spending eight hours on my feet making sandwiches, salads, croutons, and hot cafe beverages for hundreds of bakery patrons, is it really a good idea to go home and attempt a monster batch of Whoopie Pies?
 
A miraculously successful whoopie pie.


No, it isn't, but that's what I decided to do last Friday night.

I should have known that I was too tired for baking. I couldn't measure the ingredients for the life of me, and the mixing process was downright harrowing: I forgot how many scoops of flour I had put in at one point ("Was that scoop four or five? Do I risk two more? Four or five?! Gaaahhh!"), then I confused the baking soda with the baking powder and had to estimate the difference between one teaspoon and one-and-a-half tablespoons, and then I almost added an extra half cup of milk to the batter (the measuring cup was poised above the bowl when I said to myself, "Wait a second . . . wait a second . . . No! Stop it, hand! Stop!").

But I just had to have a whoopie pie. I hadn't had one in at least a year, and my whoopie pie biological clock was apparently ticking. I used to occasionally buy them from an Amish farmer's market near my house in State College, PA. According to Wikipedia and WhatsCookingAmerica.net, whoopie pies are a Pennsylvania Amish tradition. They used to be made from leftover cake batter. Amish wives would take the extra cakes, fill them with creamy frosting, and hide them in their husbands' lunch pails. When the men would open up the boxes and discover the pies, they'd shout "Whoopie!" Though the cakes originated in Pennsylvania Dutch country, they've spread throughout New England and are becoming popular all over the U.S.

Despite my struggles, my instinctive pie lust won out and the whoopie pies survived. In fact, nearly a hundred individual whoopie cakes survived, and I was baking the darn things until 12:30 in the morning! The recipe is huge: it calls for six cups of flour, two cups of cocoa powder, three cups of sugar, and three cups of milk.

 
The mixed batter.

The resulting batter is smooth, fluffy, and very, very abundant: using my large cookie scoop, the recipe made 98 individual cakes, which made 49 whoopie pies!
 
Scoops of batter.
 
The cakes on their own were dark, delicious, and rich due to the high ratio of cocoa powder to flour, not to mention the fact that there's both butter and oil in the batter recipe*. The bottoms were damp enough to cling to the parchment paper, and the tops were sticky enough so that the cakes glommed onto each other when stacked.
 
The baked whoopie cakes, plus the crumby remnants of the first sampler cake.

The frosting was no less rich. In fact, it's better not to think about the frosting at all. In fact, it's better not to read the next two sentences if you're weak of heart or stomach. So just repress this, will you? The frosting is traditionally made with Fluff, whole milk, and shortening. That's right, pure butter Crisco, straight from the tub.
 
Sweet, fluffy death.

But enough about nutritional values: the frosting is okay when sampled with a fingertip--it's fluffy and creamy and mildly sweet. But it's fantastic when sandwiched between two moist, dense, dark-chocolatey cakes. 

These tasted exactly like the whoopie pies I bought at my farmer's market in Pennsylvania. When I ate my first one, I could almost see the mounds of fresh corn and squash and shoofly pies, and hear the Dutch accents on the air!

When you have your head about you, this recipe is actually very simple and very rewarding. Whoopie pies make for great bake sale or birthday party fare, if you're not in the mood for decorating a big honkin' cake. They're easy to make assembly line-style: just mix, bake, cool, slap on a coat of frosting, sandwich, and stack! And, of course, you get a lot of product while dirtying only a few mixing bowls. 

 
About one-fourth of the total recipe output.
This recipe comes from Moody's Diner through FoodNetwork.com. The recipe for the cakes is nearly perfect, but I agree with the Food Network commenters who thought that the frosting was very authentic but a little too synthetic/nauseatingly rich. Some of the comments suggested Martha Stewart's whoopie pie filling recipe, which I'll probably try myself next time.

Whether you fiddle with perfection or not, I strongly recommend giving whoopie pies a try: you'll never eat another mass produced Moon Pie, Swiss Roll, or Oreo again!

---------------
Whoopie Pie

Cakes:

  • 3 cups sugar
  • 1 cup butter
  • 4 eggs
  • 1/2 cup vegetable oil
  • 1 tablespoon vanilla extract
  • 6 cups all-purpose flour
  • 2 cups unsweetened cocoa powder
  • 1 teaspoon baking powder
  • 1 1/2 tablespoons baking soda
  • 1 teaspoon salt
  • 3 cups milk
  • Filling, recipe follows

Preheat oven to 350 degrees F, or preheat a convection oven to 315 degrees F.

In a large bowl of an electric mixer, beat the sugar, butter, and eggs together until well combined. Add the oil and vanilla and beat again.

In a separate bowl, combine all of the dry ingredients. Add half of the dry mixture to the egg mixture and beat or stir to blend. Add 1 1/2 cups milk and beat again. Add the remaining dry mixture and beat until incorporated. Add the remaining 1 1/2 cups milk and beat until blended.

With a large spoon, scoop out 32 circles of batter onto a baking sheet. Bake for 10 to 12 minutes. Let cool.
Spread filling onto 16 circles and place remaining circles on top, to make 16 Whoopie Pies.

Filling:

1 1/2 cups shortening
3 cups confectioners' sugar
1 1/3 cups marshmallow topping
Dash salt
1 teaspoon vanilla extract
1/3 to 1/2 cup milk

In the bowl of an electric mixer, combine all ingredients except the milk and beat well. Add just enough milk to achieve a creamy consistency. Spread filling across cooled cookie circles.
 
The finished whoopies.
 
*Please note that whoopie pies are a leading cause of heart disease, stroke, diabetes, and Weight Watchers memberships. Please consume with discretion. And a napkin.

12.28.2009

My Very Homemade Christmas: Gift Baskets, Sore Muscles, and Sugar Cookies

As you may have noticed, over the holidays, I took an accidental week off from blogging. Things just got too hectic, in part because I decided to make most of my Christmas presents this year. Between baking enough treats to fill four gift baskets for friends and family, helping with my mom's Christmas Day brunch, prepping snacks for house guests, and making my gift for the family bottle exchange, I had quite a week on my hands! I spent a total of fourteen hours in the kitchen by the time Christmas rolled around, and I went through almost five pounds of butter and eight pounds of flour!

For my gift baskets, I made five batches of cinnamon rolls, one recipe of dense chocolate loaf cake, one recipe of banana bread, a double batch of puppy chow, and a double batch of sugar cookies.

Batch #5 of cinnamon rolls!


Puppy chow, tailgate mix, sugar cookies, chocolate loaf, and banana bread, wrapped and ready to go!


The treats nestled all snug in their gift baskets!


As tiring as all that baking was (I thought my arms would fall off from the kneading!), I had a great time doing it! And the house smelled fantastic all week long. 

But the best thing about my baking spree was being able to share my favorite recipes with some of my favorite people. The cinnamon rolls are, of course, a slightly modified version of Paula Deen's recipe, and the dense chocolate loaf cake comes from Nigella Lawson's How to Be a Domestic Goddess

The banana bread is my Grandma Bill's recipe as it appears in the official Heller-Higgins family cookbook. This is by far my favorite banana bread recipe because it's really more of a banana-flavored cake than a bread--I even use cake flour in the recipe to make it even smoother and cakier! 

But the sugar cookies have to be my favorite recipe. I love frosted sugar cookies, in part because they're such a huge part of my family's holiday traditions. My Grandma Bill always makes a few batches of sugar cookies for Christmas Eve. She also makes something like 300 sugar cookies for my family to frost at Easter time. Some of my favorite childhood memories are of sitting around my grandma's dining room table, surrounded by cousins and aunts and uncles. The table would always be covered with newspaper; mounds of crisp, butter-yellow cookies; crystal mugs brimming with colored frosting and sticky knife handles; and trays of sprinkles in every shape and color imaginable. We would all end up with sticky fingers, clothes speckled with multicolored frosting stains, and wildly colored plates stacked with fresh sugar cookies! 

This Christmas, I got to bake my two batches of sugar cookies with the help of my youngest cousins Tucker, Zoe, and Augie. Zoe helped me roll out and shape the cookies, and all three of the kids helped me frost. We had flour all over the kitchen floor and frosting splattered four feet away from our frosting station, but, heck, any mess is worth baggies full of soft, powdery, sugary, colorful goodness, right?


A gift baggie of sugar cookies.


My sugar cookie recipe is a little different from my Grandma Bill's, however. My recipe of choice combines my Aunt Rita's Sugar Cookie recipe with Nigella Lawson's Butter Cut-Out Cookie recipe. The two original recipes are very similar, but their proportions differ slightly: Aunt Rita's recipe calls for more sugar, more fat, and shortening instead of butter, while Lawson's recipe calls for real unsalted butter, less sugar, and cake flour for added softness. 

I think that my combined recipe takes the best parts of both recipes. And instead of Lawson's hot water and powdered sugar frosting, I use my mom's favorite frosting: a tiny bit of softened butter, a hearty splash of vanilla, a slosh of 1% milk, and a whole lot of powdered sugar. 

This, I believe, creates the perfect sugar cookie: it's soft and pale and powdery, yet crisp at the edges and sturdy enough for rough treatment. And they improve after a day or two of sitting out. As the cookie absorbs the frosting's moisture, the cookie becomes moist and tender while the frosting hardens to form a rich, sugary, delectable crust.


---------------
Lesley's Hybrid Sugar Cookies
Adapted from Nigella Lawson's Butter Cut-Out Cookies and Aunt Rita's Sugar Cookies

Cookie Ingredients
  • 3/4 cup softened unsalted butter
  • 1 cup sugar
  • 2 large eggs
  • 1 teaspoon vanilla extract
  • 1 1/3 cups all-purpose flour
  • 1 1/3 cups cake flour
  • 1 teaspoon baking powder
  • 1 teaspoon salt
Frosting Ingredients
  • 2 tablespoons softened salted butter
  • 1 tablespoon vanilla extract
  • 1/4 to 1/2 cup milk
  • 2 to 3 cups powdered sugar
Directions

Combine flours, baking powder, and salt in a small bowl. Whisk together to combine.

In a large bowl, cream butter and sugar together until pale. Beat in eggs and vanilla. Add the dry ingredient mixture and beat until smooth. If possible, refrigerate dough for one hour.

Roll out the dough on a floured counter top until the dough is approximately 1/4 inch thick. Cut into shapes with cookie cutters and bake on ungreased cookie sheets at 360 degrees for 8 to 10 minutes (or until the edges are very slightly browned). Allow cookies to set on the cookie sheet before moving them onto cooling racks.

While the cookies cool, begin the frosting by briefly whipping the softened butter with a fork or whisk. Add vanilla extract and a splash of milk. Add two cups of the powdered sugar and mix until smooth. Use the fork or whisk to smooth out any persistent chunks of butter.

Once the mixture is smooth, add more sugar or milk as needed to reach a slightly watery yet spreadable consistency. Spread the frosting onto cooled cookies with a knife.

12.06.2009

How to Snickerdoodle

I think that "snickerdoodle" should be a verb. Whenever I hear it, I don't think of delicious cookies covered in a fine dusting of cinnamon, I think of someone doing the twist with great vigor while giggling uncontrollably.

The Snickerdoodle looks like this, only sillier.

This may be a result of some crossed wires in my brain, or maybe it comes from how darn much I love snickerdoodles; they make me prone to boogieing.


There are two types of snickerdoodles in this world:
  1. The Soft Variety: These snickerdoodles are soft and chewy and vanilla-y. They're basically sugar cookies rolled in cinnamon and sugar. I'm a big fan of these, but I've only ever found them at professional bakeries.
  2. The Crispy Variety: The equally delicious crispy snickerdoodles make a pronounced "crunch" as you bite into them. The uncooked dough is more like that of a butter cookie (dense, smooth, and a little sticky) than the dough of a sugar cookie (dry and sort of flexible). These are what the below recipe makes.
This recipe comes from Emeril Lagasse of "BAM!" fame. I never would have thought that Emeril, king of beefy sandwiches and Cajun cuisine, could dream up such a delicious cookie, but these are just about perfect. My only change was to add a little more sugar to the coating mixture for extra sweetness.

These are easy that I don't know why I've never made them before. All you do is mix the ingredients as directed, scoop the dough into rough 1 1/2" balls, roll them in cinnamon and sugar . . .


flatten them into chubby little pucks . . .


and bake. You don't even have to worry about making the flattened pucks perfectly round--the cookies rise and spread into perfect circles all on their own.


The recipe suggests that you take the cookies out of the oven when just the edges are browned, but that's pretty much impossible since the cookies are covered in brown powder. The way I could tell when my cookies were done was that they looked like the above picture: the centers were still puffy, but the edges had gone flat and crispy.

These are the first Christmas-y thing I've made this month. Here's the rest of my to-do list:
  • gingerbread (the cake-y kind, not the cookie variety)
  • soft and puffy sugar cookies
  • puppy chow
  • peanut brittle
  • something involving Red Hots
  • cinnamon rolls (and lots of them!)
Wish me luck! 
---------------

Ingredients

  • 2 3/4 cups all-purpose flour
  • 1 teaspoon baking soda
  • 1/2 teaspoon fine salt
  • 1/2 cup shortening
  • 8 tablespoons (1 stick) unsalted butter, softened
  • 1 1/2 cups sugar, plus 3 tablespoons
  • 2 large eggs
  • 1 tablespoon ground cinnamon

Directions

Preheat the oven to 350 degrees F.

Sift the flour, baking soda, and salt into a bowl.

With a handheld or standing mixer, beat together the shortening and butter. Add the 1 1/2 cups sugar and continue beating until light and fluffy, about 5 minutes. Add the eggs, 1 at a time, beating well after each addition. Add the flour mixture and blend until smooth.

Mix the 3 tablespoons sugar with the cinnamon in a small bowl. Roll the dough, by hand, into 1 1/2-inch balls. Roll the balls in the cinnamon sugar. Flatten the balls into 1/2-inch thick disks, spacing them evenly on unlined cookie sheets. 

Bake until light brown, but still moist in the center, about 12 minutes. Cool on a rack.

11.05.2009

How to Make Chocolate Kiss Cookies


Half-price Halloween candy, anyone?

Usually, I don't eat Hershey's Kisses. They taste sort of ashy and buggy and sour to me. But they were on sale the day after Halloween, and there's no better way of disposing of them than the Chocolate Kiss Cookie.


Yum.

They're perfectly lazy little cookies, too, so easy to make! All you do is combine your wet ingredients--

Oh, wait . . .

[rattling through the fridge--a shuffling of pickle jars, a brandishing of wilting lettuce heads]


Where's the milk?

[the fridge door swings ominously shut]

Well, shucks.

First, you beg your poor, long-suffering, sainted mother to go to the grocery store to pick up the milk that you thought you had when you preheated the oven.

While she's gone, you really get down to business. Cream the shortening (butter works too, but shortening keeps these nice and puffy) together with your white and brown sugars. Then beat the peanut butter in the mixture until the whole thing's a little fluffy. Then you add the vanilla and the egg and wait for the milk to arrive.

In the meantime, you mix your dry ingredients (the flour, baking soda, and salt) together in a separate bowl, and take a few minutes to unwrap precisely forty-two Hershey's Kisses.

Once your sweet, kind, cookie-hungry mother returns, you can beat the milk, egg, and vanilla into your dough. Add the dry ingredients to the wet mix in a couple of installations until everything's well combined. After that, use your fancy schmancy scooper to form dough balls. Roll each ball between your palms so that it's kinda round-ish.

Roll these in white sugar and throw 'em on the pan.


Bake for ten minutes or until the cookies start to turn golden brown on top.

Now here's the really important part: once you pull the pan out of the oven, never, NEVER wait to smush your room-temperature Kisses onto your oven-hot cookies. Not even to take a picture for your blog!

Well, okay, so maybe you can wait ten seconds for your camera to turn on. But if you wait too long before putting the Kisses on top of the cookies, the Kisses won't stick. You'll end up with wonky little peanut butter cookies with dents on top and a handful of naked Kisses rolling around in the bottom of your cookie jar, and that's a sad sight.

Let the cookies sit on the pan to cool for a few minutes, then move them somewhere to finish cooling. Be sure to play with the liquified Kisses by smushing them into funny shapes and twirling their hard tips and generally behaving like a second grader and getting chocolate everywhere.

(This is a very important step.)

Obviously, these cookies are simple, fun, and great to make with kids (or a twenty-five-year-old who enjoys playing with her food). And you get to discover that Hershey Kisses are much improved when melted and smeared all over a peanut-buttery, sugary, chewy little cookie.


---------------
Easy Chocolate Kiss Cookies
From the kitchen of Janet Hammer

Ingredients
1 3/4 cups flour
1 teaspoon baking soda
1/2 teaspoon salt
1/2 cup white sugar
1/2 cup brown sugar
1/2 cup shortening
1/2 cup creamy peanut butter (or crunchy, if you're kinky like that)
2 tablespoons milk
1 teaspoon vanilla
1 egg
extra white sugar for rolling
42 unwrapped Hershey's Kisses

Directions
Preheat your oven to 375 degrees.

Mix flour, baking soda, and salt in one bowl.

In a second bowl, cream white sugar, brown sugar, and shortening together by beating until the mixture is well-combined and fluffy. Cream peanut butter into the mixture. Add the egg, milk, and vanilla and beat until combined.

Add half of the dry ingredients to the wet mixture and beat until combined. Add the rest of the dry ingredients and combine.

Roll dough into balls 1" in diameter. Roll dough balls in white sugar and place on a cookie sheet. Bake for 10-12 minutes. Remove from the oven and press one unwrapped Hershey Kiss onto each cookie's center.

Let cool for as long as you can stand before eating.

8.08.2009

Lemony Spritz Cookies


The whole process of making Lemony Spritz Cookies started with a vague memory and a craving. A few weeks ago, I was thinking about my mother's cookie press, which she dug out of her basement in 2001 when I was still in high school. She had never used it, and I only used it once. But I remembered those cookies for their crumbly, buttery deliciousness, and I couldn't resist making them again when I found the cookie press box nestled between recipe books in my mother's pantry.

The box looks like it was sold in the '80s and has both English and French on it. Inside, the illustrated instructions are written in English, but there's also a list of recipes written in German. I suppose this is because spritz cookies are German in origin and are popular in Scandinavian countries at Christmas time ("spritz" is German for "squirt" or "spray").

I followed the recipe that came on the typed supplement sheet, and the cookies turned out splendidly. They were just as I remembered them: soft, cakey, and floury, with the same sort of dense, crumbly texture that you find when biting into a pecan sandie (a texture that comes, I think, from using only one egg--or in the case of sandies, no eggs--and using pressure to make the thick dough hold together).

I used butter instead of margarine, but I would recommend sticking with margarine or even shortening if you have it. Once the kitchen got hot, the dough seemed to have a harder time keeping its shape and sticking to the parchment paper-covered baking sheets; an artificial source of fat might not have this problem. I also countered the softening dough by chilling it in the fridge between press refills and making sure the pans were completely cooled before I re-spritzed them. Be careful not to over-bake these. Take them out at the slightest hint of brown at the edges or else they'll taste dry and burnt.

I used lemon flavored gelatin for these, which made the cookies slightly tangy but not too lemony (I'm not sure I would have recognized the taste as lemon if I hadn't made these myself!). I suspect that strawberry gelatin would also make for mild, fragrant, and delicious baby pink cookies.

Also, you should note that this recipe makes a lot of cookies with a standard cookie press. This doesn't mean that these take a long time (the cooking time is short and you can fit a lot of cookies on a single sheet), but it does mean you'll have a lot of deliciousness to go around. Since spritzes are traditionally Christmas cookies, perhaps you're meant to make them in big batches and give them away as gifts!
---------------

Gelatin Spritz Cookies

From Kitchenmate

3 1/2 cups flour
1 teaspoon baking powder

1 1/2 cups margarine
1 cup sugar
1 small box gelatin (any flavor)
1 egg
1 teaspoon vanilla


Cream margarine, sugar, and gelatin. Add egg and vanilla and beat well. Gradually add flour and baking powder and blend until smooth. Fill Kitchenmate Cookie Press with dough. Using cookie discs, press cookies onto an ungreased cookie sheet. Bake at 400 degrees for 7-10 minutes. Enjoy!

8.03.2009

Chocolate Chocolate Chip Cookies


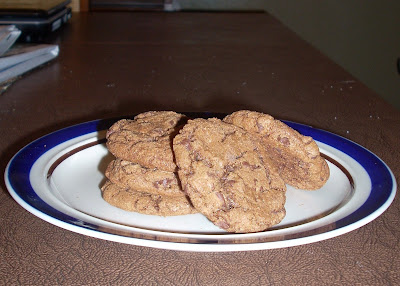
I've been looking for a way to jazz up the standard Toll House Chocolate Chip Cookie recipe for a few years now. I love chocolate chip cookies, of course, but they don't have much of a wow factor, and sometimes, they're just not chocolaty enough for me. Fortunately, I stumbled across Cathy Lowe's recipe for Chocolate Chocolate Chip Cookies on FoodNetwork.com. They were not at all difficult to make, but they were vastly superior to the chocolate chocolate chip cookies you can make following the old Toll House recipe; those cookies always had a corpsy grayish color and a plasticy texture.

Lowe's recipe, however, made for cookies with a lovely rich brown color; a crisp, macaroon-like shell; and a line of soft, brownie-like texture on the inside. To me, their natural cracks and fissures look a little like half-cooled lava covered with a broken crust of rock. Maybe I should call these Lava Crispies?

Anyway, their chocolate flavor is rich and very noticeable, even in bites without chocolate chips. My only criticism of the recipe is that the cookies dried out and turned hard very quickly, even when stored in an air-tight container. They're not the best cookies to keep around the house for a week, so it's better to make this recipe only when you plan on sharing!

I took the FoodNetwork.com reviewers' suggestion to bake the cookies at 350 degrees. At that temperature (and with my insulated cookie pans), the cookies took about 11 minutes per batch. I didn't grease my cookie sheets, but I did use parchment paper. I also used miniature chocolate chips so the chocolate chip texture was distributed over more cookie space. One last thing: I would suggest making the teaspoon of salt scant if you're sensitive to sodium (I was always thirsty after a couple of these!).

Enjoy!

-----------------------------------------------------------------------------

Chocolate Chocolate Chip Cookies

Recipe Courtesy of Cathy Lowe


Ingredients
  • 2 1/4 cups flour
  • 1 teaspoon salt
  • 1 teaspoon baking soda
  • 2 sticks butter, softened
  • 1 cup granulated sugar
  • 1 cup packed brown sugar
  • 2 large eggs, beaten
  • 1 tablespoon vanilla
  • 1/2 cup unsweetened cocoa
  • 2 cups chocolate chips, 2 Hershey's chocolate bars, chopped or M&M'S
  • 1 cup chopped walnuts (optional)
Directions

Preheat oven to 375 degrees. In a bowl stir together flour, salt, and baking soda. In another large bowl stir together butter, both sugars, eggs, vanilla and cocoa. Gradually stir flour mixture into butter mixture and mix until combined. Stir chocolate chips and walnuts, if using, and stir to distribute evenly.

For cookies: Drop dough by tablespoonfuls onto greased baking sheets and bake about 10 minutes. Cool on a baking rack.

For bars: Pat dough into a greased 9 inch square baking pan and bake 20 to 25 minutes. Cut into squares when cooled